When the summer heat hits, few things are as comforting and indulgent as a scoop of creamy, dreamy ice cream. Now, imagine that classic frozen treat transformed into a luscious, dairy-free delight that not only cools you down but also honors your vegan lifestyle. Enter the world of homemade vegan coffee ice cream-a rich, velvety dessert that marries the bold, invigorating flavor of freshly brewed coffee with the smooth, decadent texture of plant-based cream. Whether you’re a seasoned vegan, a coffee lover, or simply an adventurous foodie, learning how to craft this delightful frozen concoction at home is a game-changer. Get ready to chill out and whip up a batch of this irresistibly creamy vegan coffee ice cream that promises to awaken your taste buds and elevate your dessert game.
Chill Out: How to Make Creamy Homemade Vegan Coffee Ice Cream
Chill Out: How to Make Creamy Homemade Vegan Coffee Ice Cream invites you on a delectable journey to harness the natural richness and silkiness of plant-based ingredients combined with the bold, aromatic essence of coffee. This indulgent yet health-conscious dessert elevates classic ice cream with a vegan twist, unlocking layers of deep coffee flavor that linger with every creamy spoonful.
Prep and Cook Time
Preparation: 15 minutes | Chilling: 4 hours | Freezing: 6 hours
Yield
Approximately 6 generous servings
Difficulty Level
Medium – requires patience during chilling but simple assembly steps
Ingredients
- 2 cups canned full-fat coconut milk (well shaken)
- 1 cup raw cashews (soaked in hot water for 1 hour and drained)
- 3/4 cup organic maple syrup
- 2 tablespoons instant espresso powder (or finely ground dark roast coffee)
- 1 tablespoon pure vanilla extract
- Pinch of sea salt
- 1 teaspoon sunflower lecithin (optional, for extra creaminess)
- 1/4 cup almond or oat milk (unsweetened)
Instructions
- Prepare the coffee infusion: In a small bowl, whisk the instant espresso powder into the almond milk until fully dissolved. Let this cooling coffee concentrate rest while you prepare the base.
- Blend the creamy base: In a high-speed blender, combine the coconut milk, soaked cashews, maple syrup, vanilla extract, and sea salt. Blend on high until the mixture is ultra-smooth and creamy, about 2-3 minutes. Scrape down the sides to ensure no lumps remain.
- Incorporate coffee and lecithin: Add the coffee concentrate and sunflower lecithin (if using) into the blender. Blend again just until evenly combined. The lecithin acts as an emulsifier, aiding in silky texture and stability.
- Chill the mixture: Pour the ice cream base into a bowl, cover tightly, and refrigerate for at least 4 hours, or overnight. This step intensifies flavors and improves texture.
- Churn to perfection: Transfer the chilled mixture to your ice cream maker. Churn according to manufacturer instructions, usually about 20-25 minutes, until the texture is creamy and scoopable but not fully frozen solid.
- Freeze to set: Spoon the churned ice cream into an airtight container. Freeze for 4-6 hours to achieve firm, scoopable consistency.
- Serve creatively: When ready to enjoy, let the ice cream soften at room temperature for 5 minutes before scooping for the creamiest experience.
Tips for Success
- Soaking cashews: Don’t skip this. Soaking softens them and makes blending ultra creamy, eliminating any gritty texture.
- Coffee choice: Use freshly ground, high-quality coffee or specialty espresso powder for depth and aroma. Experiment with a cold brew concentrate for a smoother flavor if preferred.
- Lecithin substitute: If unavailable, a teaspoon of coconut oil can enhance creaminess but be mindful it may slightly affect flavor.
- Make-ahead: The base can be made and chilled up to 3 days in advance, making this recipe perfect for meal prep or unexpected coffee cravings.
- Troubleshooting: If the mixture tastes too sweet or bitter, adjust maple syrup and coffee amounts incrementally in future batches.
Serving Suggestions
Dress your creamy vegan coffee ice cream with:
- A drizzle of dairy-free chocolate sauce
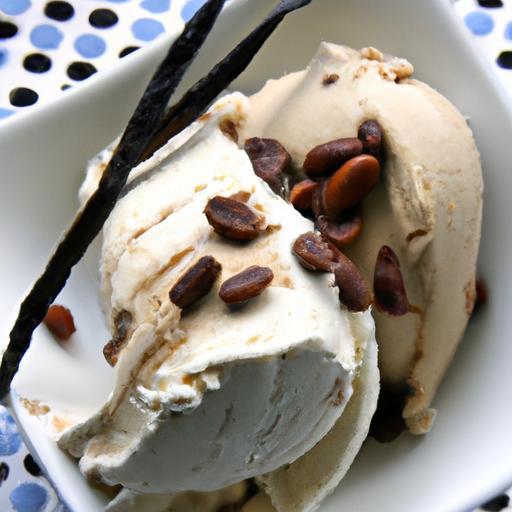
- A sprinkle of toasted pecans or crushed cacao nibs for crunch
- Fresh berries or sliced bananas to add brightness
- A dusting of cinnamon or nutmeg for warming spice notes
- Vegan whipped cream and a sprig of fresh mint for elegant presentation
Serve in chilled bowls or atop warm vegan brownies for a decadent dessert pairing. This luscious ice cream also pairs beautifully with a shot of espresso or your favorite plant-based milk latte for double coffee bliss.

Nutrition at a Glance
| Per Serving | Calories | Protein | Carbs | Fat |
|---|---|---|---|---|
| Calories | 220 | 4g | 20g | 15g |
For more inspiration on vegan desserts and vegan culinary secrets, check out our guide on Ultimate Guide to Vegan Desserts. Learn more about the benefits of plant-based fats and coffee pairing over at Harvard Health Publishing.
Q&A
Q&A: Chill Out – How to Make Creamy Homemade Vegan Coffee Ice Cream
Q1: Can you really make coffee ice cream creamy without dairy?
A1: Absolutely! Vegan coffee ice cream gets its luscious creaminess from plant-based ingredients like coconut milk, cashews, or almond cream. These rich bases mimic the smooth texture of traditional ice cream, creating a dreamy scoop without any animal products.
Q2: Which plant-based milk works best for vegan coffee ice cream?
A2: Coconut milk is a superstar here thanks to its high fat content, which transforms into a silky texture when frozen. Cashew cream is also a fabulous option if you prefer a slightly lighter, nutty twist. Almond and oat milks can work too, but often need added thickeners to achieve that velvety mouthfeel.
Q3: How do you get that bold coffee flavor to shine through?
A3: The secret is using strong, freshly brewed espresso or cold brew concentrate. Adding coffee grounds infusion enhances the depth, while a splash of coffee liqueur (vegan-friendly, of course) can give it an extra kick. Balance the bitterness with a touch of natural sweetness like maple syrup or coconut sugar.
Q4: Is it necessary to have an ice cream maker?
A4: Not necessarily! While an ice cream maker does the heavy lifting for churning and aeration, you can still whip up a creamy batch by blending your ingredients well and freezing them in a shallow container. Stirring the mixture every 30 minutes breaks up ice crystals and promotes that coveted creamy texture.
Q5: Can you customize this recipe for different dietary needs?
A5: Definitely! The vegan base can be adapted for nut allergies by choosing coconut or oat milk. Sweeteners can be swapped out for agave, monk fruit, or stevia to accommodate sugar sensitivities. The best part? You can jazz it up with vegan chocolate chips, cinnamon, or a drizzle of caramel syrup for your own signature twist.
Q6: How do you store vegan coffee ice cream for best taste and texture?
A6: Keep your ice cream in an airtight container in the coldest part of your freezer. To avoid freezer burn or icy texture, place a piece of parchment paper directly on the surface before sealing. When ready to serve, let it sit for 5-10 minutes at room temperature for the perfect scoopability.
Q7: What’s the biggest tip for nailing creamy homemade vegan coffee ice cream?
A7: Balance-the fat, the coffee flavor, and the sweetener all play starring roles. Too little fat and the texture suffers; too much sweetener and the coffee gets lost. Experiment with small batches to find your perfect harmony, then sit back, chill out, and savor the scoop!
In Summary
As the last spoonful melts into a creamy bliss, you’ll realize that homemade vegan coffee ice cream isn’t just a treat-it’s a celebration of simple, thoughtful ingredients coming together in perfect harmony. Whether you’re a coffee aficionado or just craving a velvety cool escape, this recipe invites you to chill out and savor every luscious bite. So next time the heat rises or you need a moment of indulgence, remember: crafting your own creamy, dreamy, plant-based delight is just a scoop away. Happy freezing-and even happier savoring!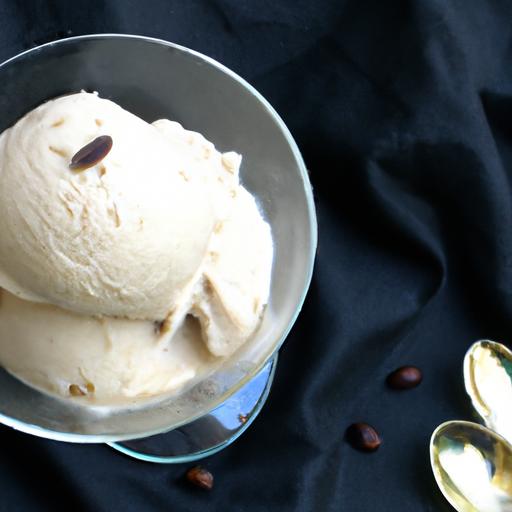


